Firstly introduced in Shopify Unite 2021, Handshake is a wholesale marketplace with lots of valuable functions for Shopify users.
Today, let’s learn about how to get started your business on this wonderful marketplace!
1. Registration to Sell on Handshake
Here are requirements you need to meet if you want to sell on this marketplace:
Your business is in the United States
Your Shopify store needs to be active and has made sales
Your products cannot be resold from other businesses
Your products need to comply with the product categories on the Handshake marketplace.
Your products must comply with Handshake Terms of Service and Handshake Product Guidelines
Your product images must comply with the Handshake Photography Guidelines.
You need to enable a direct payment provider on your store
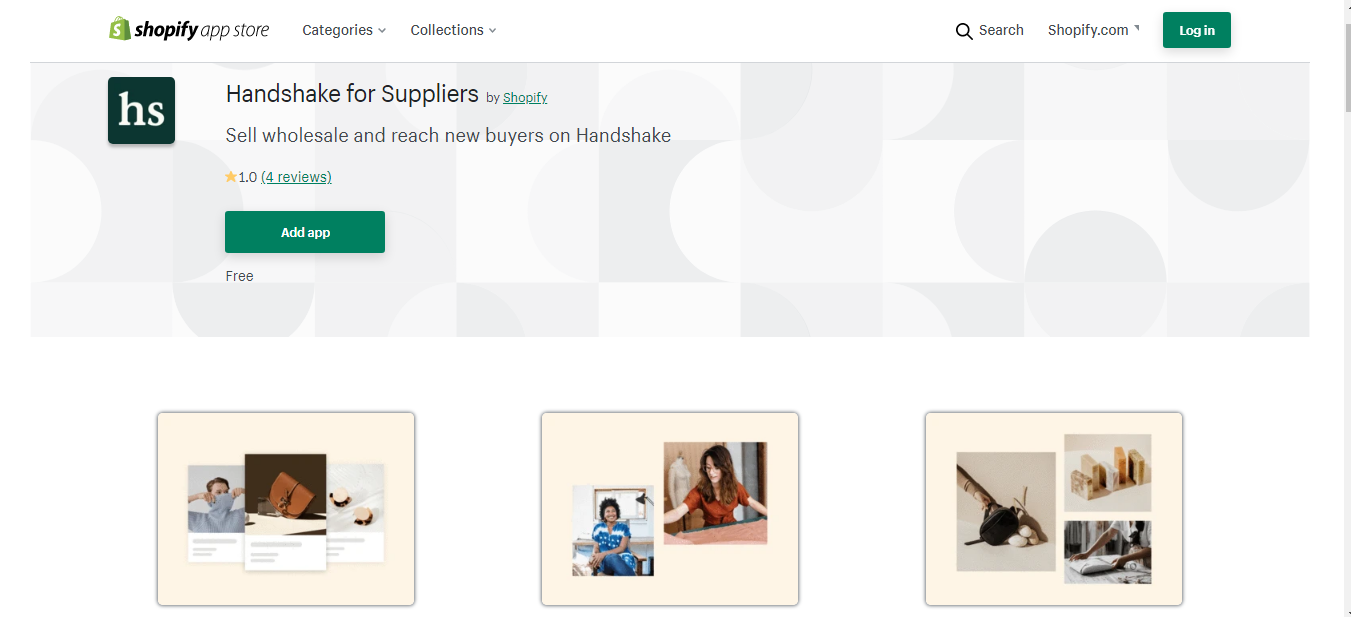
If your store meets those requirements, you can install the Handshake sales channel in the Shopify admin. Here’s how:
Step 1: Go to the Shopify App Store >> “Handshake for Suppliers”.
Step 2: Click on “Add App” >> “Add Sales Channel”
Step 3: Check the confirmation box, then choose “Continue” to accept both conditions and terms.
After the Handshake sales channel is added to the Shopify admin, your business will be reviewed within 10-14 business days. You will then receive an email about whether you’re eligible to sell or not; and if nothing sends to you, check the Spam folder or contact the team at help@handshake.com.
2. Set up Handshake Supplier Profile
After your business is allowed to sell on Handshake, you need to set up your supplier profile on this platform. Handshake could be found under the “Sales Channels” on the admin, with the “Profile” right on the first page. It’s not until you publish this profile will your products and information be available to the visitors.
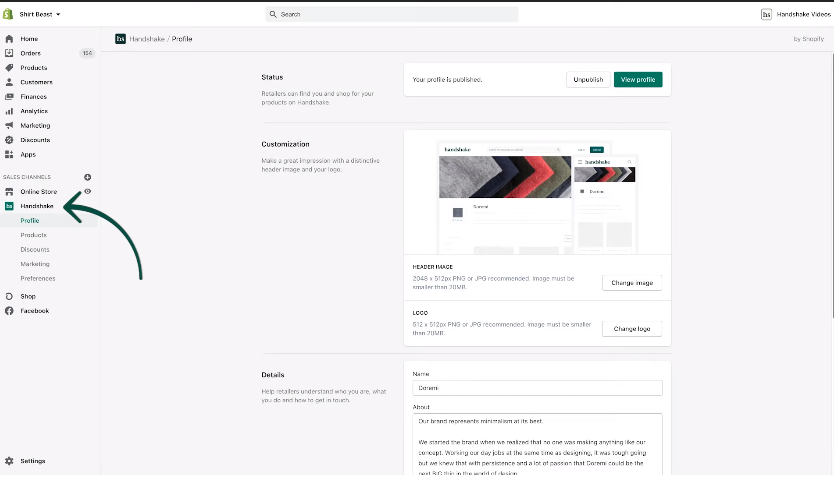
Your profile could be customized by adding a logo, a header image, and other details… Here we will show you how to set your order minimum, shipping policies, and shipping rates:
In the Shopify admin, go to “Handshake” > “Preferences”. In the Shipping part, there are two options:
“Same as store settings” means that you use the same shipping rates that have been already set up in the admin. It could be Shopify shipping or ant flat rates that you’ve created.
“Set custom rates for Handshake” means to set particular rates for Handshake orders, which is highly recommended when you use Shopify store for both wholesale and retailers.
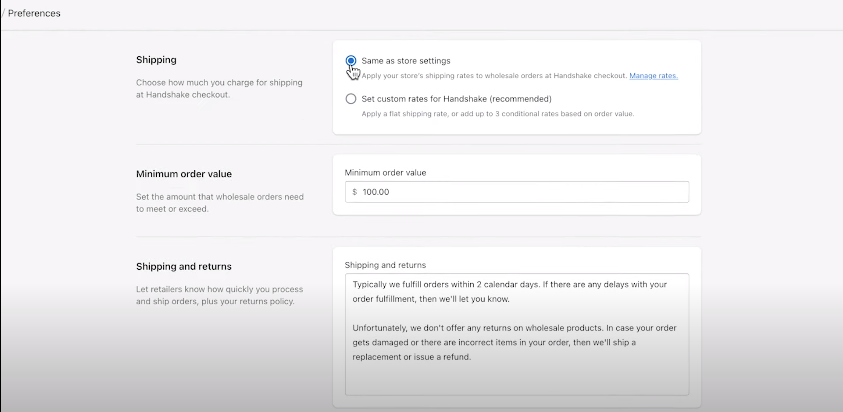
In order to make a profit or in case you offer incentives like free shipping, you need to set a minimum order value. The minimum order value could be set right under the “Shipping” part.
Last but not least, you can also add shipping and return policies for your online store. It might include some information such as order processing time, shipping fees, shipping options, return & refund policies, and so on…
3. Set up Your Products
Your products in the Shopify admins will be automatically synced to the “Products” page in the Handshake sales channel. If you want to remove any products, follow the following steps:
Step 1: In the Shopify admin, click on “Products” and select the items you want to remove.
Step 2: In the “Sales Channels and Apps” on the right hand, click on “Manage”.
Step 3: Uncheck the Handshake checkbox.
Step 4: Click on “Save” to finish.
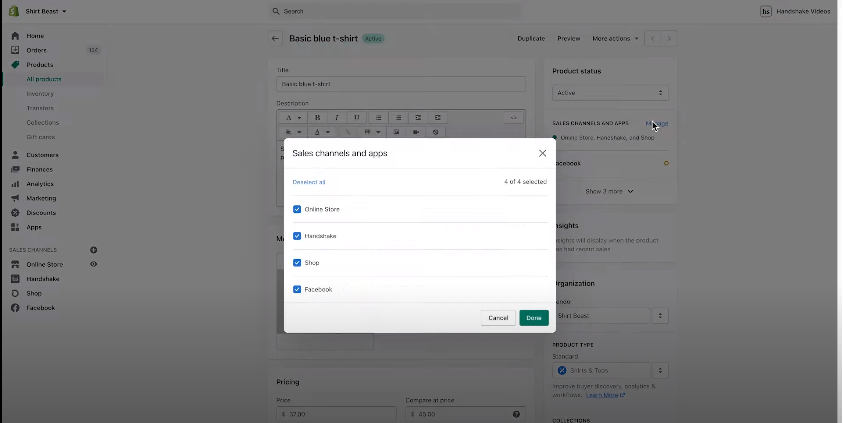
Now the products will be available for retail customers, but not available for wholesale customers on Handshake.
To will see all of the products available on the Handshake sales channel and manage product status, price, and product categories, go to the Shopify Admin, then click on “Handshake” > “Products”. Here you can edit either in bulk or individually.
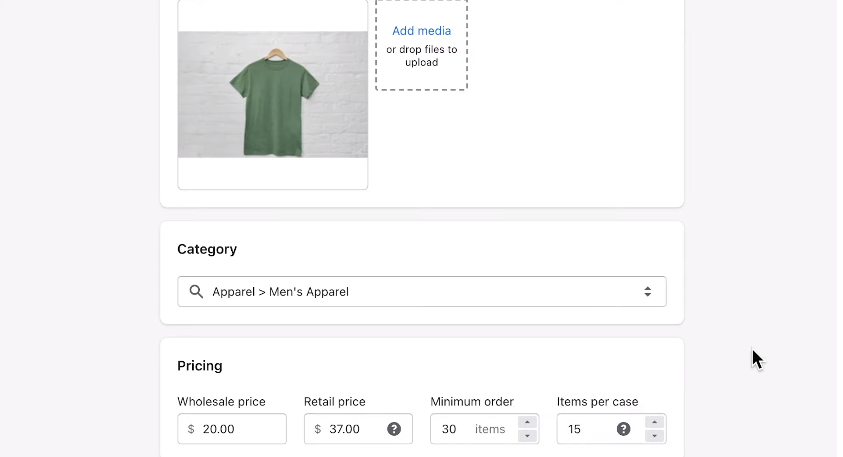
You can choose the product category, set the pricing structure, the minimum order, or the number of items sold in a case.
Imagine that you’re selling T-shirts and with the wholesale price, you need to sell at least 30 items to earn a profit. You will set the “Minimum order” at 30 items and “Items per case” at 15; so when a customer buys your T-shirt on Handshake, they must buy at least 30 items, equalling to 2 cases.
4. Publish the Supplier Profiles
When you’ve finished setting up products and preferences, it’s time to publish the profile and make it live on Handshake.com.
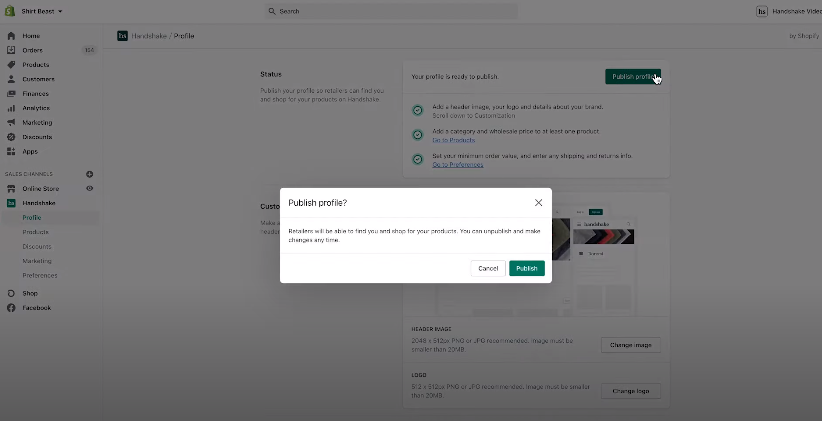
Step 1: From the “Profile” page, click on “Publish Profile”
Step 2: Click on “Publish” in the popup.
Step 3: Click on “View Profile” on the left hand to see what it looks like on Handshake.com.
Now your products are ready to be purchased! Every order will show up in your Shopify admin so that you can fulfill them easier and more conveniently.


