About The Product Widgets
The Product Widgets is an app that provides Customize Product Order Form with regularly-updated beautiful palettes and fonts to match the style and colors of your brand, and then generate you an Embeds code that you can copy and paste anywhere you want to show the product order form, eg Home page, Blog posts, Landing page, Thank you page, etc. Not only stop at Shopify, but you can also sell your products on other famous Platforms like Wix, WordPress, Joomla, Blogger, Magento, WooCommerce, Squarespace, etc.
With 4 Simple Steps, including:
- Select product
- Customize embedded details
- Generate embeds code
- Embed the buttons
You Can:
- Create the “Direct To Check Out” button
- Create the “Open Product Details” button
This also makes purchasing the products easier for customers by removing the need to go to a separate page to finalize their order.
How To Add Button To Your Blog Posts
Step 1: Select Product
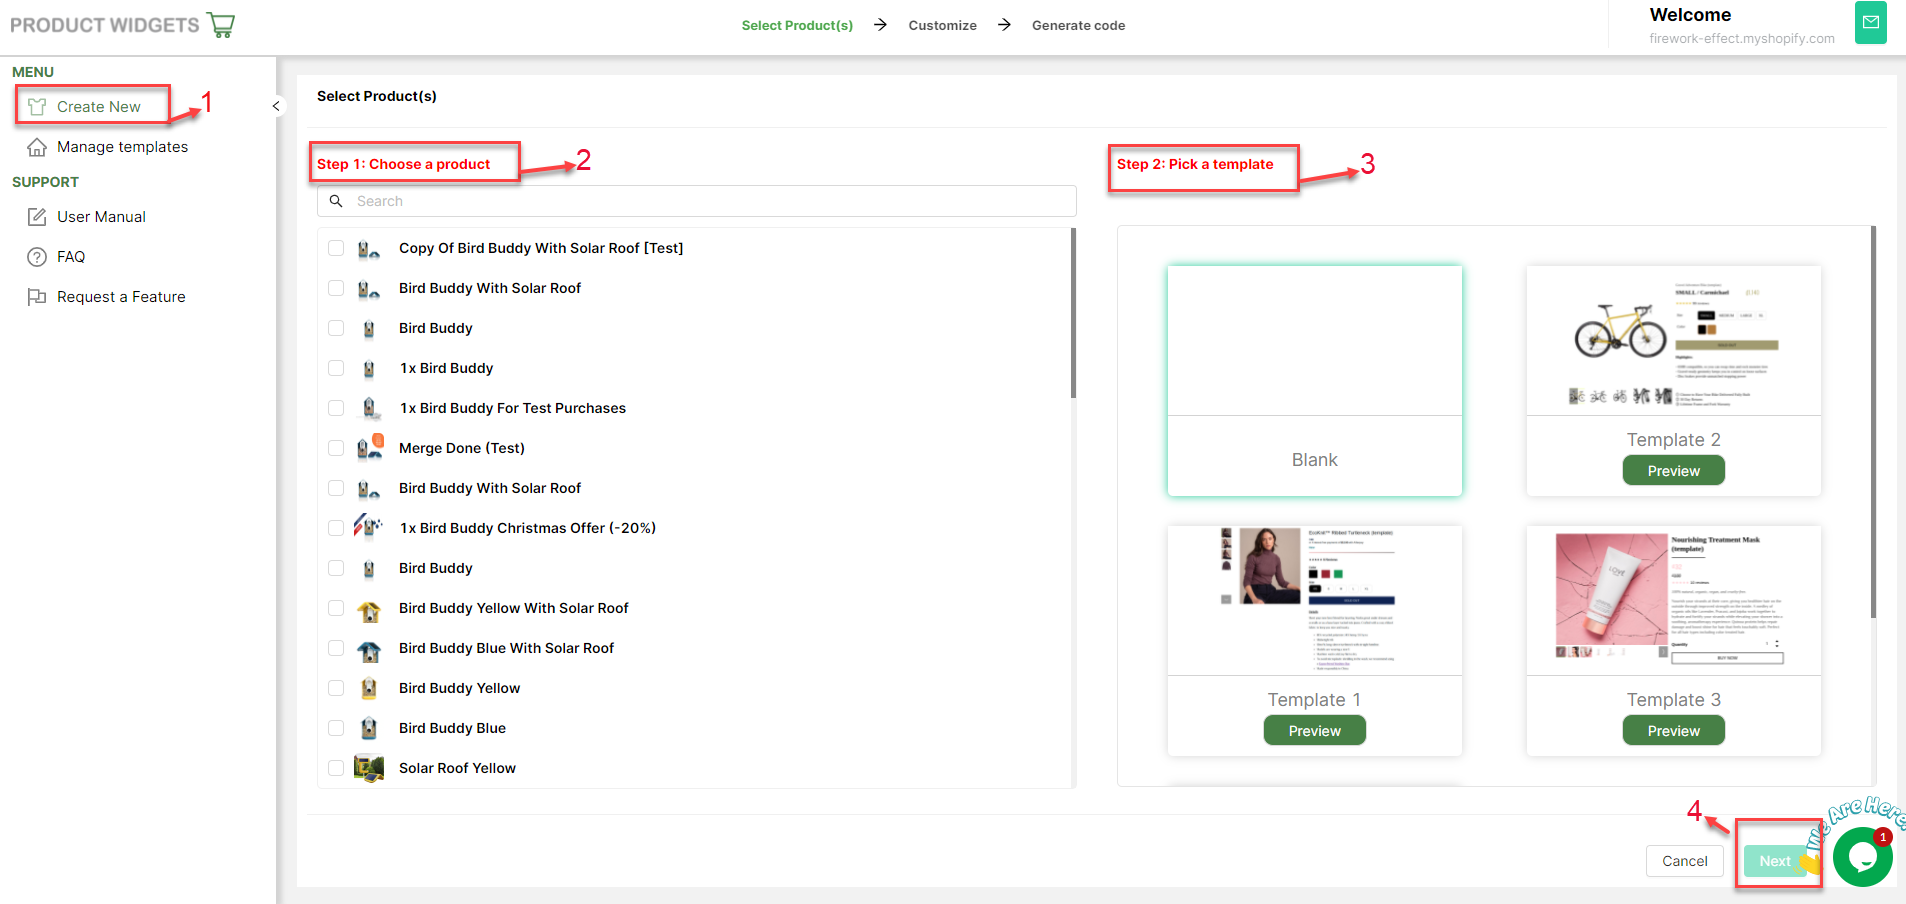
Click on “Create New”, tick the product and Pick a template you want to add to your blog post then click on the “Next” button.
Step 2: Customize The Embedded Details
- In the LAYOUTS section, Drag & Drop as many columns/rows as you want on the Product Order Form
- In the ELEMENTS section, Drag any appropriate elements then Drop them on the Layouts that you have chosen above
- Input or Fill the Shopify product value
- Customize other parameters such as: Background setting, Border setting, Padding, Margin, Font, Font size, Alignment, Text color, etc.
Step 3: Generate Embeds Code
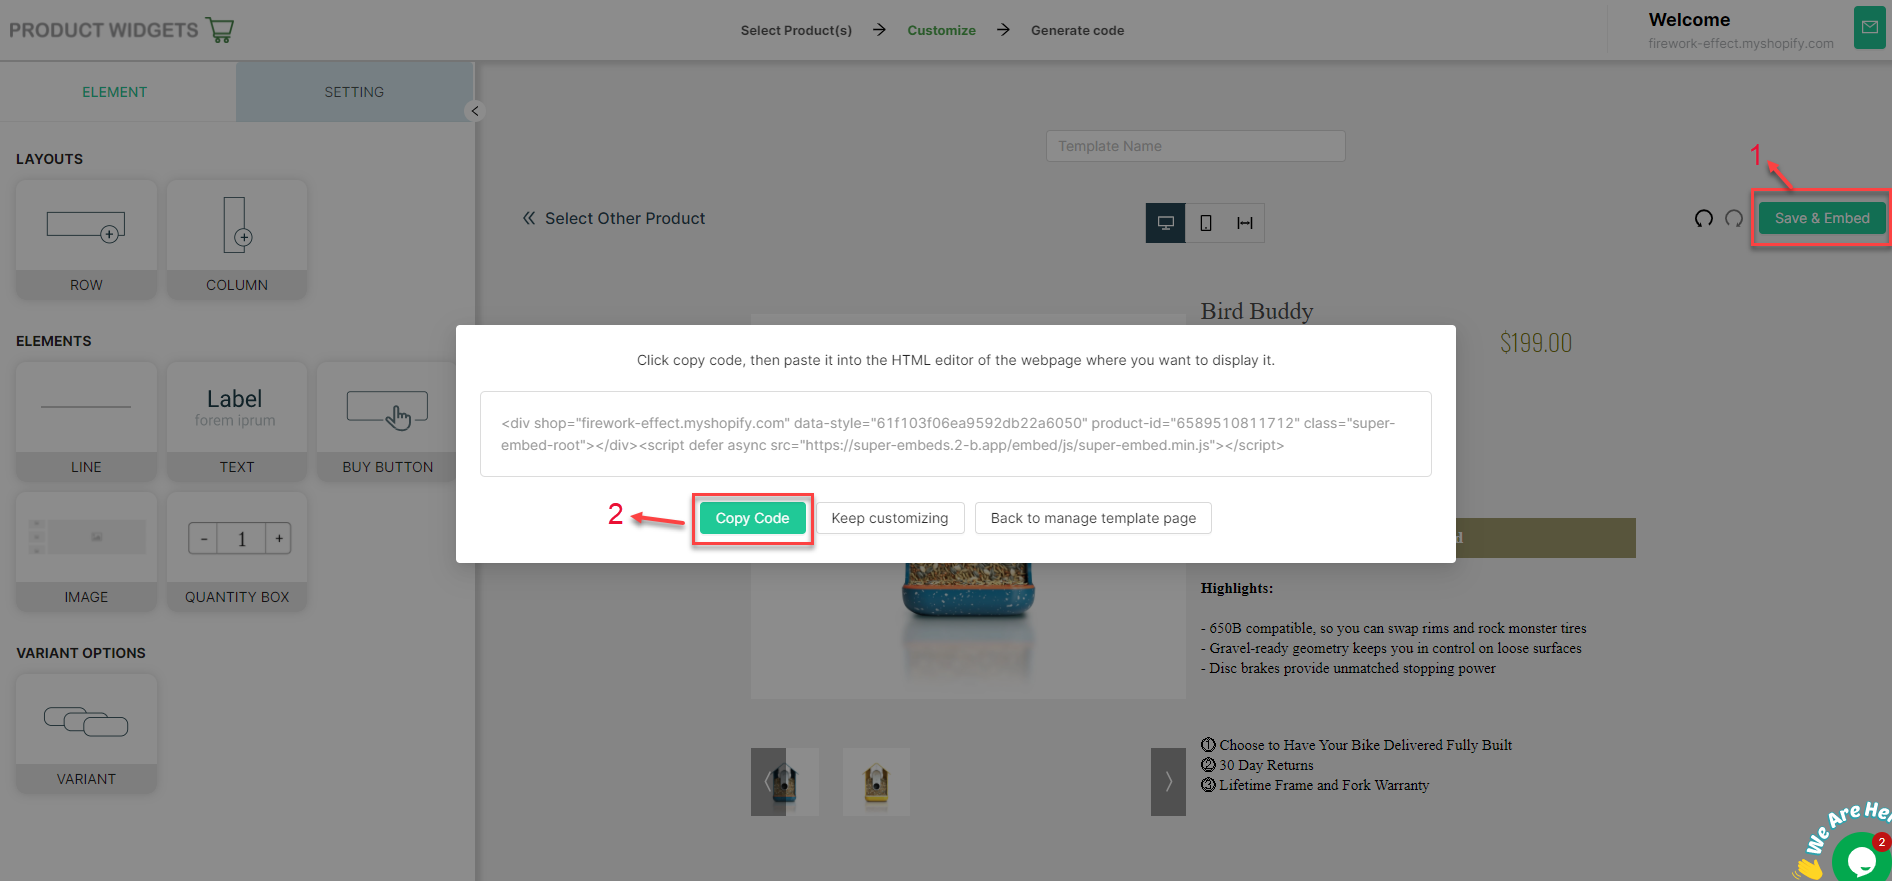
Click on the “Save & Embed” button on the right corner of the screen. The new screen appears, click on the “Copy code” button.
Step 4: Embed The Buttons
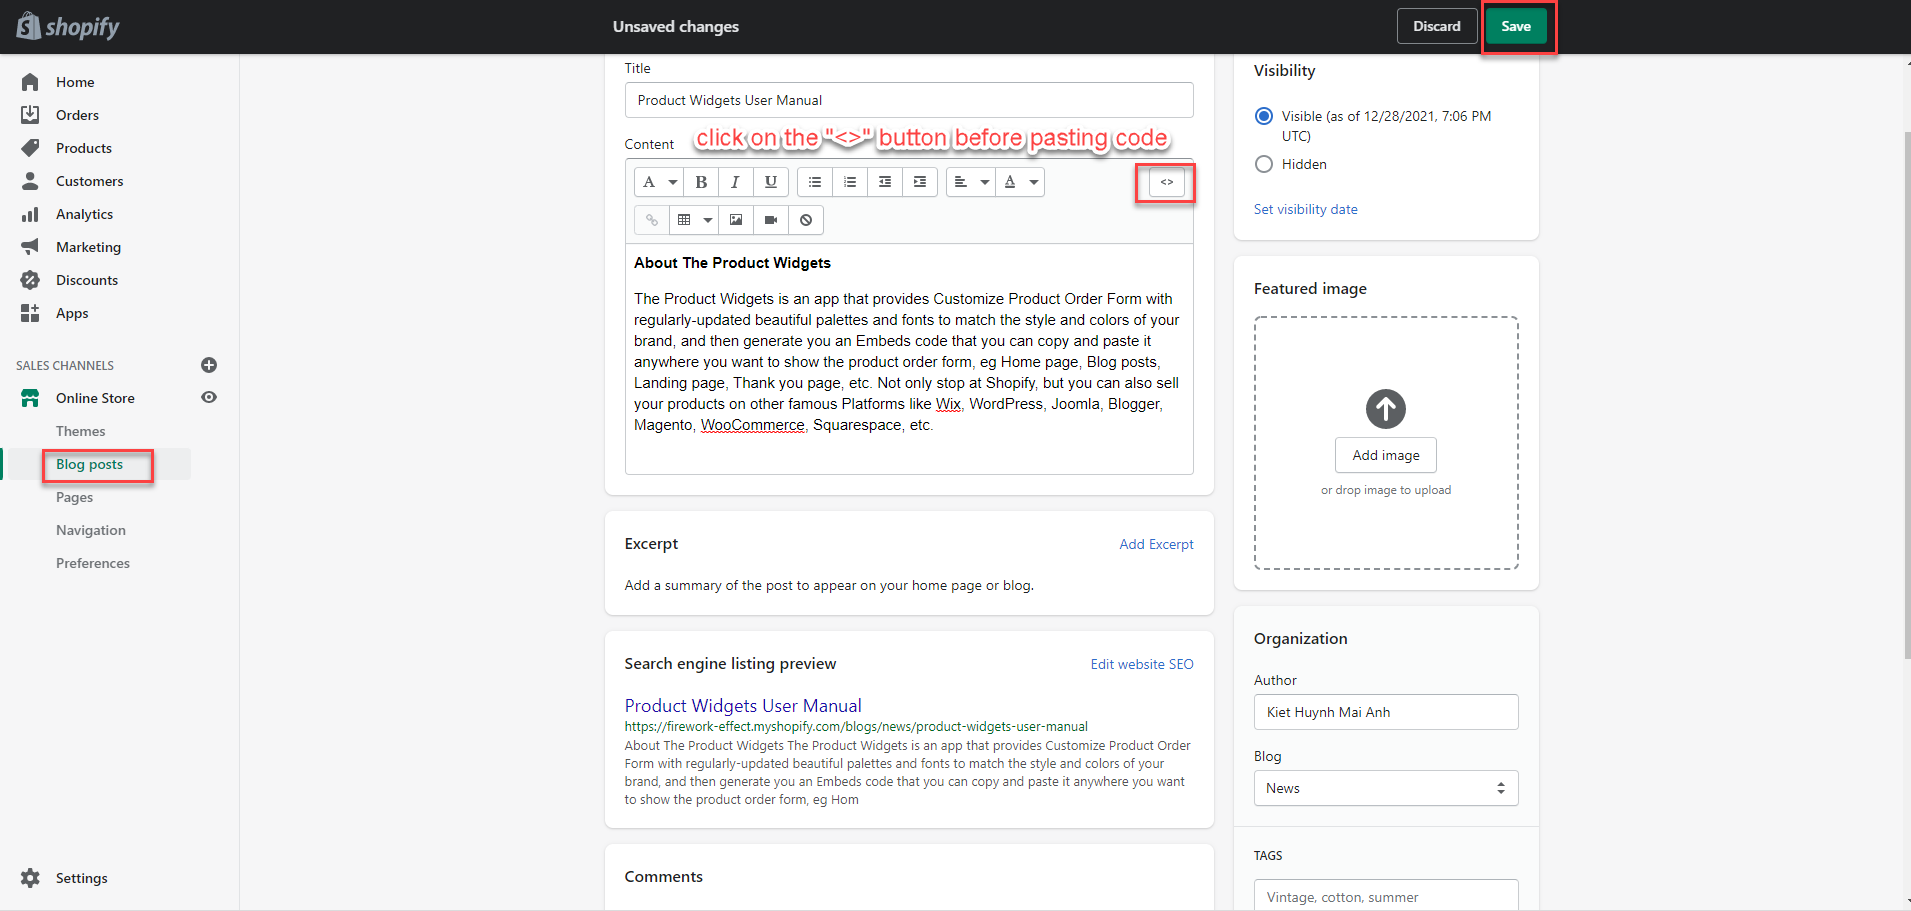
Move on to the “Blog posts” category on Shopify. You can embed the “BUY NOW” button and product details on the available post or the new one by clicking on the “Add blog post” button.
Then, at the “Content” box, click on the <> (show HTML) button and paste the code to the suitable position. Finally, click on the “Save” button to finish. Remember to fill all the needed boxes before saving your post.
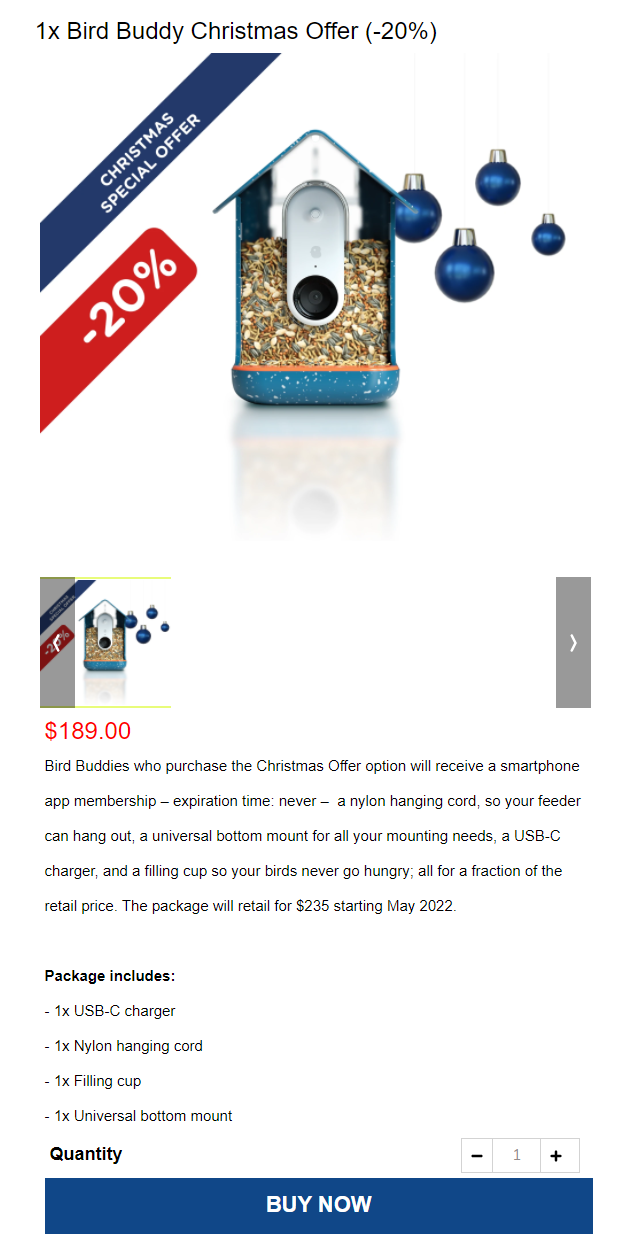
Then you can open your blog link to check your post. The image shown below is a sample:
