With the aim of saving time for online merchants, Shopify has introduced Shopify Shipping - a tool that helps you connect Shopify accounts with many shipping carrier accounts on the platform.
In this article, we will show you the definition of Shopify Shipping, how it works, and tips to get ready with the service.
1. What is Shopify Shipping?
With the ability to provide online merchants with access to shipping rates and labels all within the admin, Shopify Shipping makes your life easier as you don’t need to buy labels at the office anymore. There are many enormous benefits that you can reap after connecting Shopify account with shipping carrier accounts, such as:
- Displaying carrier-calculated shipping rates at checkout
- Having access to discounted shipping rates
- Printing shipping labels right from the Shopify admin
If you’re wondering whether your business is qualified for Shopify Shipping or not, check out this link - here Shopify continually updates eligible countries for this useful tool.
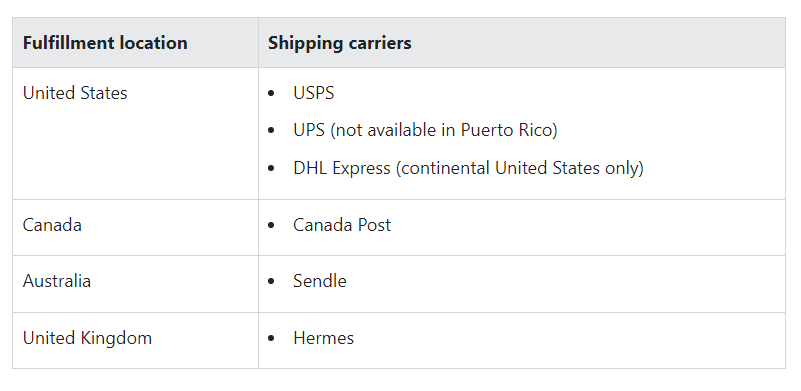
You can also check what shipping carriers are available in the Shopify admin in the picture below:

2. How does Shopify Shipping Work?

To sum up, Shopify Shipping works like this:
- Step 1: Merchants select suitable shipping carriers and shipping options they want to show at checkout
- Step 2: Customers choose their shipping service and speed at the checkout
- Step 3: Merchants receive payments for the order and shipping costs.
- Step 4: In the Shopify admin, merchants fulfill the order, purchase & print the shipping label and packing slip.
- Step 5: Merchants drop off the package to the carrier or schedule a pickup (if offered).
3. How to Get Started with Shopify Shipping?
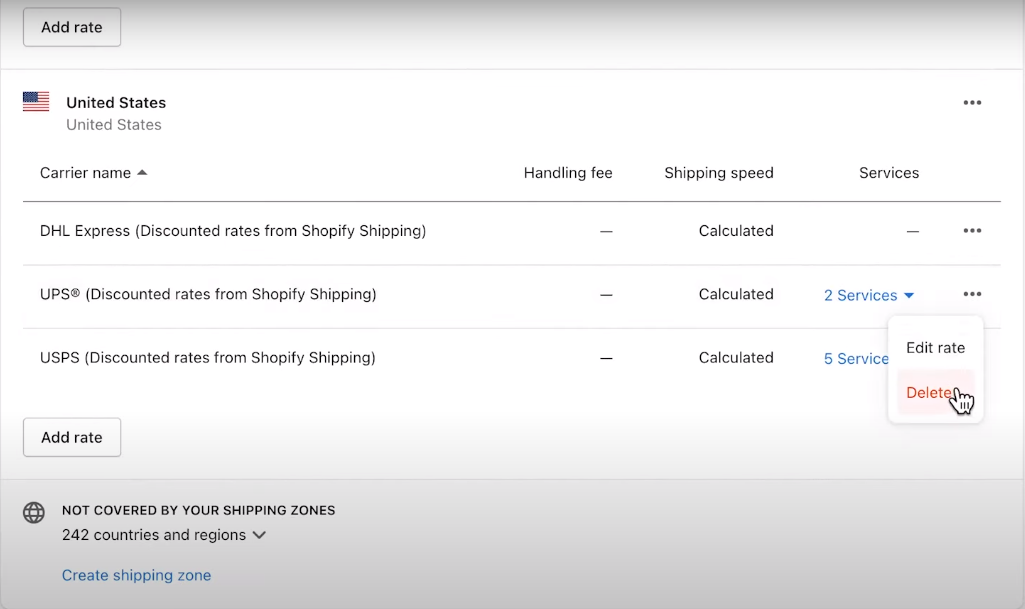
First of all, you need to check out your country’s eligibility for Shopify Shipping. If it’s okay, then some of the Shopify Shipping rates will be added to your shipping settings by default. It’s recommended to review those default rates first to make some appropriate adjustments like adding or removing carriers or rates.

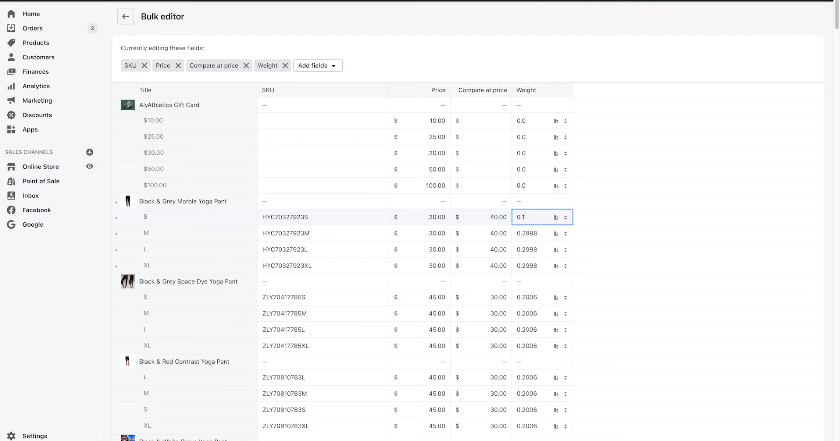
The next step is adding weights to every product so that Shopify can calculate shipping rates accurately. There are two methods for this step, which are adding the weight individually or using the bulk editor tool. Don’t forget to add the dimensions and weight of the packages that you’ll use for the shipping, as the final shipping costs are calculated based on the weight of products and packages combined.

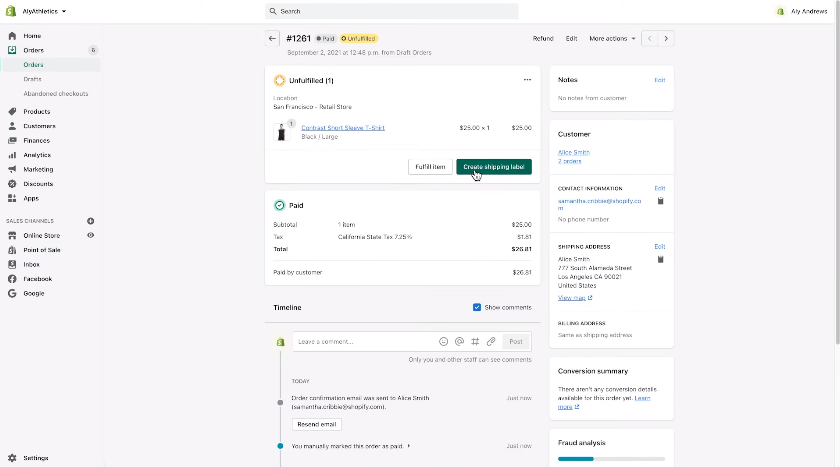
After receiving orders, go to the Orders page to print the shipping labels in bulk. If you want to do it individually, open each order to see the shipping option chosen by customers, then print labels one by one.

Now that you’ve known about Shopify Shipping and how it works! Don’t forget that we provide many other useful articles for your business, such as 7 tips to launch an online store for beginners or 8 e-commerce courses to help you launch and grow your shop.


