Are you finding a detailed guideline for starting a Shopify store? So, welcome to 2B I/O-Shopify Experts with over 9+ years of experience who will provide you with step-by-step to get a completed Shopify store via this article.
Before you start
Shopify is one of the world’s leading E-commerce platforms that provide everything for merchants to set up and manage their online stores. In addition, it is extremely easy to use, scalable and has a wide range of features and integrations.
As of January 2023, Shopify accounted for the largest E-commerce platform market share with 25% of businesses using it to push up their eCommerce store over the world.
Before starting with Shopify, there are some crucial problems that you need to consider to make your business to be up and running as fast as possible.

Decide on a target audience

A target audience is a specific group of people that a business’s marketing efforts focus on. It’s critical that you understand who your target audience is. It helps your business figure out how to reach your customers and plan for marketing campaigns with the right time, right message, offer, and product and especially to increase conversion rates and drive more sales.
There are a few key ways to go about deciding on your target audience. The first is by identifying your ideal customers. There are numerous ways to do this, including market research, surveys, and interviews. Once you have an idea of who your ideal customer is, you can then start to divide them into different groups based on factors like age, gender, location, interests, and income level.
Besides, you can also look at your current customer base to decide your target audience and it can help you to improve your marketing and make sure that you’re targeting the right audience.
Make a business plan
One of the most critical steps you need to know before you start setting up your online store is choosing the products you want to sell. However, when you complete deciding your target audience, you’re already halfway there.

Here are some effective ways to find winning products or services:
-
Check out what’s selling in other stores in your niche
-
Join relevant online communities that sell products or services appealing to you
-
Keep an eye open for any trending new products or services in the marketplace
-
Research the competition and see what gaps exist within this particular industry
-
Make sure with yourselves that you love what you sell
When you have an idea for your products, it’s time to choose a business name. This is an important decision as it is the first impression that will be the touch point for potential customers about your business, but you should not spend too much time on it.
Your business name should be reflective of the products you sell. For instance, if you’re selling jewelry, you could choose a name like Navetter Fine Jewelry or The Centre Stone. Alternatively, you could choose a more general name such as The Jewelry store. Nevertheless, we recommend the last name because adding a store or shop in the name will help you find a domain name easily.
Why choose Shopify for eCommerce
There are some key reasons why you should choose Shopify to start your eCommerce business:
Shopify is easy to use
If you are starting your online business by yourself and have little coding experience, Shopify will be completely suitable for you. Because it is designed to be easy to use with a drag-and-drop online store builder. Moreover, Shopify will provide you:
-
Drag-and-drop online store builder34
-
Straightforward admin dashboard
-
Detailed guidelines to set up the store
Those are reasons why Shopify is deserved to be experienced for your website
Shopify has dynamic support
Shopify offers you 24/7 support services through live chat, phone, and email to help you launch your website or migrate it from another platform. Besides, the support staff is available around the clock in multiple languages by live chat, email, or even phone via Shopify Help Center.
Shopify streamlines the checkout process
The checkout process must be well simplified and optimized to increase sales. You can find an online storefront that makes it simple for customers to purchase your goods. Luckily, Shopify offers Shop Pay which speeds up the online checkout process or you can utilize 100+ other payment gateways and various payment methods and currencies.
Shopify is highly secured
Your eCommerce website’s data and content are kept on a server database by your web host. Visitors can access your online store, but you need web hosting. Don’t worry when Shopify offers secure hosting in any pricing plan, so you can start a Shopify store without worrying about hosting service and security!
How to set up a Shopify Store - Beginner’s Guide
#1 Create a Shopify account
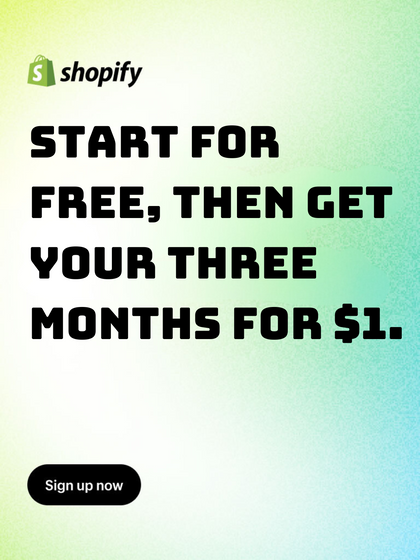
Go to Shopify Hompage, enter your email address, and click Start free trial. You can choose to answer some questions by Shopify. Or else, Shopify streamlines your registration process by letting you skip everything and start your 3-day free trial.
After the trial period, you can start your Shopify store with only $1/ month for the first three months. Let's get started with the deal here!

#2 Add products to the Shopify store
Now your Shopify store’s been started, and you’ve got access to the Shopify admin dashboard. Before you complete setting up your Shopify store, you need to upload some products. Let’s find out how to add products to your Shopify store.
On the dashboard, navigate to the Products section. Here you can find some products to sell or add your own products to your online Shopify store. If you’re about to do dropshipping or build a POD (print-on-demand) business, Shopify will recommend some product-sourcing apps like Dsers, Printful, or Sprocket.
Or, if you already have some products, click on Add your products button.

Product information is vital and tells everything about what you’re selling, so don’t ever miss filling in as detailed as possible. Here, you are able to insert product images ( you can add up to 250 images), fill in product tiles, some short descriptions, pricing, inventory, and other important information.

Don’t ever forget to fill in the Search engine listing part because this will decide how your product page will look on the search results. This is also an essential part of SEO, so don’t forget to add:
-
Page Title: Keep the title short, clear, and to the point so that people know what they’re looking at and can easily find what they want in your catalog. Because the title is one of the first impressions of customers about your products.
-
Meta Description: To write an effective description. You should focus on determining your customer persona, making it easy to read, and helping the customers see the solutions in your products.
-
URL handle (or slug): URLs should be consistent because they will optimize search engines for your site.
If you are still confused to add products to your Shopify store. Don't worry! We have the ultimate resource to support you everything about adding products to your store. Find out here!
#3 Organize product collections
Let’s understand Product collections first. Shopify product collections optimize your customers’ shopping experience on your Shopify store by making browsing simple. These products can be arranged based on your preferences or your business's niche market.
To find Collections, on your Shopify admin panel, click on Product > Collections.

In this phase of setting up the Shopify store, we want to share some small tips that would be surely helpful for organizing your collections:
-
Use catchy headers
-
Creative effective CTAs for your Shopify collections
-
Select a layout that works for your Shopify collections
-
Include the trust factor
-
Keep the greatest at the top and make simple navigation
The variety of collection pages’ design and style is depended on your chosen theme. Discover which Shopify theme is the most suitable for your business strategy and collection presentation in the next step.
#4 Pick & Customize storefront theme
Currently, there are 100+ Shopify themes on the marketplace (both Shopify free themes and premium ones). All these themes are well-designed to your need in various industries (Clothing, Electronics, Arts and crafts,...)

Especially, you can try out unlimited themes and unlimited times in your trial. Even with the paid theme, you can always choose and edit without any fee. If you’re satisfied with that, pick a Shopify plan and start selling.
Here are some main pages that you need to consider when customizing and editing the Shopify theme:
-
Homepage
-
About Us page
-
Products page
-
Optimized landing page for conversions
Custom Shopify theme is not a difficult task, but it requires a bit of patience and consistency. However, you don’t need to worry about that because we will help you to take a deeper look at how to customize Shopify themes through detailed guidelines.
If you haven't still chosen the suitable theme for your Shopify store. The following articles may be helpful:
1. Best Themes To Use For Shopify Multi-Vendor Marketplace
2. 21 Best Shopify Themes To Use In 2023
#5 Set up store navigation
After you’ve got all pages, collections, and landing pages, it’s time to connect and link everything together. Your visitors will be less likely to leave your Shopify store if your website has simple navigation that allows them to search for what they need
On your dashboard, navigate to Online Store -> Navigation

Your online store has two default menus that can be seen on every page: Main menu and Footer menu.
Main menu
Particularly, the main menu is presented as a list of things in a sidebar or as items across the width of the header. To access your items and company details like the “About us” page, a consumer will likely check your main menu.

You can also add a drop-down menu or a sub-menu from the main menu. It’s usually displayed as a list of items linked to the main menu item. Drop-down menus are helpful for grouping product collections, blogs, or store policies.
_1.png")
For instance, you can look at the image above. The highlighted part is the Main menu of Morphe- a popular cosmetic store that chose Shopify to power the website. When having a lot of products, they add them to collections and then organize them by using a drop-down menu. This may make it easier for a customer to find the things they want.
Footer menu
The footer menu is usually displayed in the width of the footer. Your customers will probably look at your footer menu to find your store policies and contact information.
 (1).png")
Each theme has a different design, so the navigation may be different. Hence, you can experience it during your trial (make use of it because Shopify lets you try unlimited themes!) and find your most suited design.
#6 Add a custom domain
On the Shopify dashboard, navigate to the Setting section > Domain

Firstly, we will introduce 3 ways to add domains to Shopify, including:
-
Transferring your domain to Shopify
#7 Set up your payments process
Payment
The payment process is the most important part of your online store if you want to generate sales which include 3 main sections: payments, checkout, taxes & shipping. When you start a Shopify store, carefully configure these sections to deliver a seamless shopping experience for your customers.
On your dashboard, click on Settings > Payments. You can find, add and set up the payment method with any third-payment provider or with Shopify Payment (the integrated processor of Shopify).

If you want to set up Manual payment methods, scroll down a little, and you may see that option to configure. “ Manual payments methods” include:
-
Create a custom payment method
-
Bank Deposit
-
Money Order
-
Cash on Delivery (COD)
Customize your Checkout
You can customize the appearance of your new Shopify store by going to Theme Settings and playing around with the different checkout options. You can click through to your checkout settings (or go to Settings -> Checkout) if you need to customize how your checkout works.

Below are the options you can select for your checkout:
-
Customer accounts: Depending on your store’s focus, you can decide if customers need to make an account to finish their purchase. If you run a wholesale or members-only business, this would be beneficial.
-
Customer contact: After placing an order, customers can choose whether they want to be contacted by email or SMS text message.
-
Form options: You can select to keep extra information like a first name or company name hidden, optional, or required during checkout.
-
Order processing: There are options available to make ordering simpler and easier, or you can add an extra confirmation step.
-
Marketing consent: By subscribing to your marketing emails and SMS, customers can stay updated on your latest products and offerings.
-
Tipping: Customers can add a tip to their online purchases to show support for your business.
-
Abandoned checkouts: Customers that don’t finish their purchase at checkout (this can happen due to many reasons) can receive an automated reminder email
 (1).png")
Shipping and delivery
As your customers reach the checkout page, you may need to collect their shipping information. On the Shopify admin panel, find Setting > Shipping and delivery.
 (1).png")
Before configuring and setting up shipping, it’s significant to know about different shipping carriers and different shipping rates (you can check it out here). After that, you may get insight into how Shopify shipping works, and you can construct general shipping rates and special shipping rates.
Here are some key points that you need to set up ultra carefully when you start a Shopify store:
-
Shipping
-
Local Delivery
-
Local Pickup
-
Shipping labels
This information is necessary for delivery. You surely do not want to parcels to get lost, and your customer may not want to wait for long. Once again, optimize your shipping to enhance customer satisfaction with your service.
Set up your tax rates
Depending on the country, many merchants will be required to charge sales tax or VAT (value-added tax) on their products. To avoid any penalties, it would be best to ask a professional how you should configure these taxes for your store.

Despite the fact that Shopify will automatically handle most tax calculations for you by using default sales tax rates around the world, it’s still a good solution to do some research or ask a tax professional about how much sales tax you should be charging. If your region has different taxes for certain products or shipping, you need to change the default tax settings.
You can manage your tax regions by navigating to Settings -> Taxes and Duties in Shopify. If you want, you can edit the default rates here, or apply overrides for special conditions that might be applied to your region or products.
#8 Add promotion channels
On your admin panel, find Settings > Apps and sales channels.
This is optional, you can sell via Shopify solely, or you can leverage your sales by connecting to other sales channels. We suggest you integrate Shopify with marketplaces like Amazon or Etsy for multichannel selling. You can look for a great source of sales channels on the Shopify app market.

If you’re having an offline store, let’s add Shopify POS to create a seamless sell-in-person experience.
#9 Add necessary Shopify apps for your store
On your dashboard, click on Settings > Apps and sales channels
For a successful and optimal eCommerce Shopify store, you may need more apps rather than just using the default features of Shopify. That does not mean Shopify apps are not good, but they’re not enough for you to scale and sell on your online business.

Moreover, you can access to Shopify App Store and explore thousands of apps & add-ons for your Shopify store.
Additionally, you may need apps related to Support and SEO&Marketing. With the explosion of dropshipping, you may also want to add drop ship features to your Shopify eCommerce store.
#10 Test your Shopify store
You are nearly complete with starting a Shopify store. Now, you may want to test some orders before they are officially sold.
On the Shopify admin panel, find Settings > Payments.

Find and click on See all other providers (as seen in the image below). When clicking in, you will get into the Third-party payment providers section. For testing, click on ‘(for testing) Bogus Gateway’ and activate it.
Currently, you can get access to your store and act like a customer to check how your Shopify store payment and order run. Therefore, you will know the problems of your store and can contact the support team for more information.
#11 Pick a plan & Launch your Shopify store
Pick a plan
Get ready to start your online business. It’s time to pick a Shopify plan and launch your store.
Currently, there are 6 Shopify pricing plans including
-
Shopify Basic: costs $29 per month, with 2.9% + 30¢ per online transaction.
-
Advanced Shopify: costs $299 per month, with 2.4% + 30¢ per online transaction.
- Shopify Plus: Start at $2000 per month
-
Shopify Starter: $5 per month
-
Shopify Lite: $9 per month, with 2.9% plus 30¢ per online transaction

To find out more about each Shopify plan and decide which plan suits you the most, you can read more here:
After your 3-day free trial, you only have to pay $1/month for 3 months when choosing the Shopify Basic plan (the most popular Shopify pricing plan). If you want more functions to support your business, you can transfer higher Shopify pricing tier.
Launch your store
Excellent job! You’ve just completed creating your first Shopify store. To achieve success, open it to the public and begin advertising to attract potential customers. Your store is currently password-protected and only viewable by you or others who have the password.
Go to Online Store -> Preferences and you can start to sell on your Shopify store. Once there, scroll to the bottom of the page and disable the password requirement. You will need to select a plan and pay Shopify before you can start using their services, but after that’s all taken care of – you’re good to go!
Once again, let’s learn how to start a Shopify store from scratch with the infographic below!

Conclusion
Starting an online storefront is effortless when you follow our detailed guidelines for newbies. With a low-cost investment and some time, Shopify can help your business get success by building a professional store. If you have questions along the way, don’t hesitate to contact us! Our team has 9+ years of experience in providing Shopify Services and helping businesses like yours to build a high-converting Shopify store.