It’s hard to deny the importance of customer service to the success of an online store. However, excellent service often requires much time and effort, which is particularly difficult for merchants with a small amount of staff.
If you’re in that situation, don’t worry because Zendesk Support & Chat is here to help you!
1. What is Zendesk Support & Chat?
Zendesk Support is an omnichannel app that makes customer inquiries from every channel (chat, email, messaging, social media, and so on) appear in one place only. Thanks to that, your agents can reply to those questions quickly without toggling from one platform to the other.

In addition to that, Zendesk and Shopify integration also allow users to process cancellations and refunds from Zendesk, customize order data to be shown in the platform, and embed live chat to any website that is powered by Shopify.
2. How to Integrate Zendesk with Shopify?
First of all, you need to log in to your Shopify account and install the Zendesk app in Shopify. There will be two scenarios here: you have a Zendesk account or you don’t have one.

a. If you have a Zendesk account:
- Step 1: In the Zendesk platform, click on “I have an account”, then enter your Zendesk subdomain.
- Step 2: Permit the integration to get access to your Zendesk account.
- Step 3: Put Web Widget in the storefront.
b. If you don’t have a Zendesk account:
- Step 1: In the Zendesk platform, click on “Get started”, complete required fields, and select “Register”.
- Step 2: Visit your email account for verification.
- Step 3: Go back to the integration set-up page, click on “Next”.
- Step 4: Permit the integration to get access to your Zendesk account.
- Step 5: Put Web Widget in the storefront.
3. How Does The Integration Work?
After the integration, the “Contact Us” form in your Shopify store will be linked to Zendesk, leading to the fact that every email here will be sent to the platform.
In the Zendesk platform, pay attention to the Home tab with all of the emails (from now on, we’ll call them “tickets”). On the right side, click on the “View” to see where your staff will spend most of their time. Here you can see tickets divided into different categories based on nature (such as “Order Tracking Tickets”, “Return & Exchange Requests”), or based on the source (such as “Facebook & Twitter Tickets”).

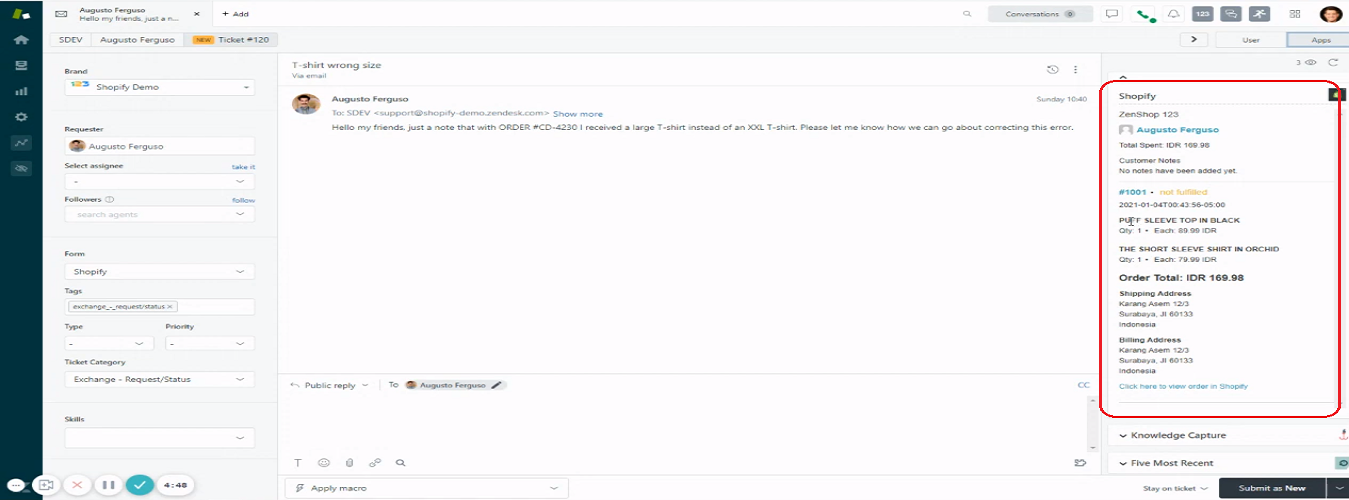
Choose the ticket you would like to reply to. Based on the email of the sender, Zendesk will quickly search for their order details and display them on the right-hand side.

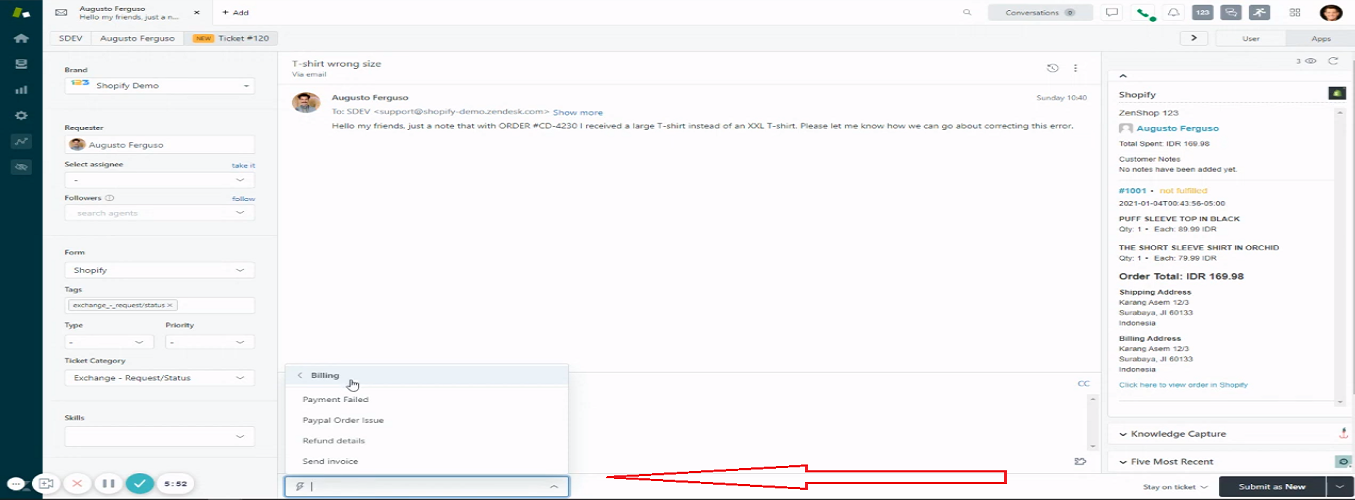
You can also use macros (a predefined tag in Zendesk) to quickly respond to customers. After choosing suitable categories in the “Apply Macro” box, the macro will show an automated response message for you. All you need to do is remove the irrelevant part, hit “Submit”, and wait for the predefined message to be sent.

Besides Shopify and Zendesk integration, we also provide some tips to connect Shopify with eBay, Printful, WordPress, Instagram, Amazon, and Facebook Messenger. Check out these articles if you want to boost sales for your business right away!

